ในบทความนี้เราจะสอนวิธีการติดตั้ง Netdata สำหรับใช้ในการ Monitor Nginx เพื่อเป็นข้อมูลในการนำมาปรับประสิทธิภาพของ Nginx ให้ทำงานได้ดีขึ้น
Netdata เป็นระบบตรวจสอบโอเพนซอร์สสำหรับเซิร์ฟเวอร์ Linux ซึ่งทำงานแบบ real time ใช้งานง่าย สามารถตรวจสอบการใช้งานของ CPU, Memory, IPv4/IPv6 networks และ applications เช่น Nginx, fail2ban, MySQL, MongoDB เป็นต้น ทั้งนี้ยังติดตั้งได้หลายระบบปฏิบัติการ
ระบบปฏิบัติการที่สามารถติดตั้ง Netdata
- Alpine Linux
- Arch Linux
- CentOS
- Debian Linux
- Fedora
- Gentoo Linux
- PLD Linux
- RedHat Enterprise Linux
- OpenSUSE
- Solus Linux
- Ubuntu Linux >= 18.04
ขั้นตอนการติดตั้ง Netdata
เราจะมาติดตั้งบนระบบ CentOS 7 ซึ่งได้ติดตั้ง Nginx ไว้เรียบร้อยแล้ว
ขั้นตอนที่ 1 : ตรวจสอบว่ามีการติดตั้ง stub_status module ไว้แล้ว
# nginx -V 2>&1 | grep -o with-http_stub_status_module
![]()
ขั้นตอนที่ 2 : Config Nginx เพื่อ enable stub_status module ที่ไฟล์ nginx.conf ใน Path : /etc/nginx/ (แนะนำให้ backup ไฟล์ nginx.conf ไว้ก่อนดำเนินการแก้ไข)
# cd /etc/nginx/
# vi nginx.conf
วางไฟล์ด้านล่างนี้ไว้ใน server {}
location /stub_status {
     stub_status;
     # Security: Only allow access from the IP below.
     allow 127.0.0.1;
     # Deny anyone else
     deny all;
 }
ตรวจสอบการตั้งค่า
# nginx -t
nginx: the configuration file /etc/nginx/nginx.conf syntax is ok
nginx: configuration file /etc/nginx/nginx.conf test is successful
ทำการ restart Nginx และทดสอบเรียก stub_status module
# systemctl restart nginx
# curl http://127.0.0.1/stub_status
Active connections: 1
server accepts handled requests
 1 1 1
Reading: 0 Writing: 1 Waiting: 0
ขั้นตอนที่ 3 : ติดตั้ง Netdata
ก่อนดำเนินการติดตั้ง Netdata เราจะต้องติดตั้งแพ็กเกจสำหรับ Netdata โดย yum ตามด้างล่างนี้
# yum -y install zlib-devel libuuid-devel libmnl-devel gcc make git
autoconf autogen automake pkgconfig curl jq nodejs
จากนั้นดาวน์โหลด Netdata และทำการติดตั้ง เมื่อพบข้อความ “Press ENTER to build and install netdata to your system” ให้ทำการ ENTER และรอการติดตั้ง
# git clone https://github.com/firehol/netdata.git --depth=1
# cd netdata/
# ./netdata-installer.sh

  ^
  |.-.   .-.   .-.   .-.   .  netdata
  |   '-'   '-'   '-'   '-'   real-time performance monitoring, done right!
  +----+-----+-----+-----+-----+-----+-----+-----+-----+-----+-----+-----+--->


  You are about to build and install netdata to your system.

  It will be installed at these locations:

   - the daemon     at /usr/sbin/netdata
   - config files   in /etc/netdata
   - web files      in /usr/share/netdata
   - plugins        in /usr/libexec/netdata
   - cache files    in /var/cache/netdata
   - db files       in /var/lib/netdata
   - log files      in /var/log/netdata
   - pid file       at /var/run/netdata.pid
   - logrotate file at /etc/logrotate.d/netdata

  This installer allows you to change the installation path.
  Press Control-C and run the same command with --help for help.

Press ENTER to build and install netdata to your system > >> ENTER
และรอจนติดตั้งเรียบร้อย จะขึ้นแจ้งตามด้านล่าง
เมื่อ Netdata ติดตั้งเรียบร้อยแล้ว จะแสดงรายละเอียดดังนี้
netdata by default listens on all IPs on port 19999,
so you can access it with:

  http://this.machine.ip:19999/

To stop netdata run:

  systemctl stop netdata

To start netdata run:

  systemctl start netdata


Uninstall script generated: ./netdata-uninstaller.sh
Update script generated   : ./netdata-updater.sh

netdata-updater.sh can work from cron. It will trigger an email from cron
only if it fails (it does not print anything when it can update netdata).
Run this to automatically check and install netdata updates once per day:

sudo ln -s /root/netdata/netdata-updater.sh /etc/cron.daily/netdata-updater

 --- We are done! ---

  ^
  |.-.   .-.   .-.   .-.   .-.   .  netdata                          .-.   .-
  |   '-'   '-'   '-'   '-'   '-'   is installed and running now!  -'   '-'
  +----+-----+-----+-----+-----+-----+-----+-----+-----+-----+-----+-----+--->

  enjoy real-time performance and health monitoring...
*** หากมีการติดตั้ง Firewall ไว้ ให้ทำการเปิด Port 19999
ทำการ restart และ enable netdata
# systemctl restart netdata
# systemctl enable netdata
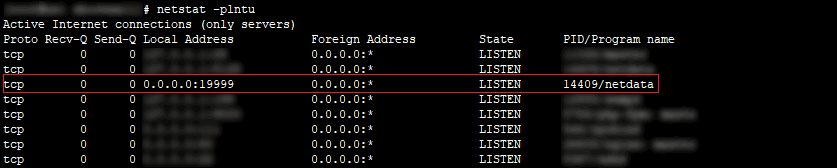
ตรวจสอบ Port 19999 ว่าเปิดเรียบร้อยแล้ว
# netstat -plntu
ขั้นตอนที่ 4 : ตรวจสอบการเชื่อมต่อระหว่าง Nginx กับ Netdata
ที่ไฟล์ /etc/netdata/python.d/nginx.conf ตรวจสอบว่ามีค่าตามข้างล่างนี้แล้วหรือไม่
localhost:
  name : 'local'
  url  : 'http://localhost/stub_status'
ทำการ restart netdata
# systemctl restart netdata
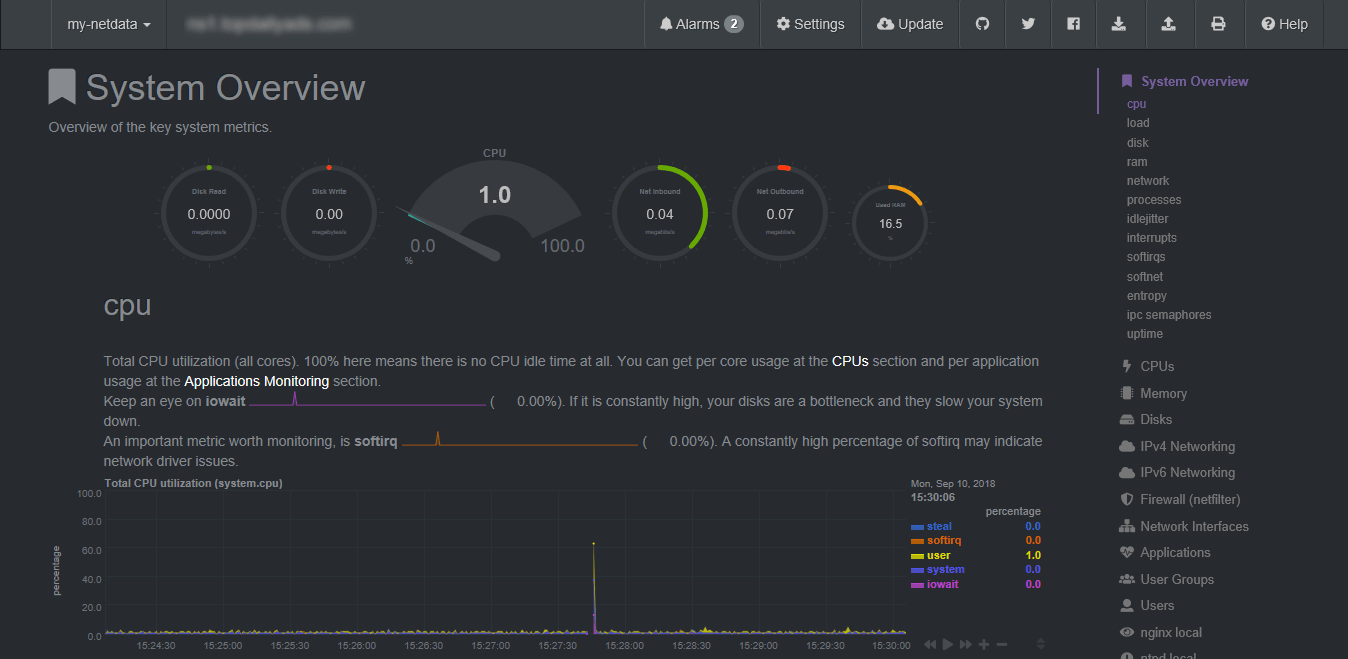
ขั้นตอนที่ 5 : การเข้าใช้งาน Netdata
เข้าใช้งาน Netdata ด้วย URL : http://[IP address of your server]:19999/
เมื่อเรียก URL สมบูรณ์จะพบหน้า Dashboard ของ Netdata
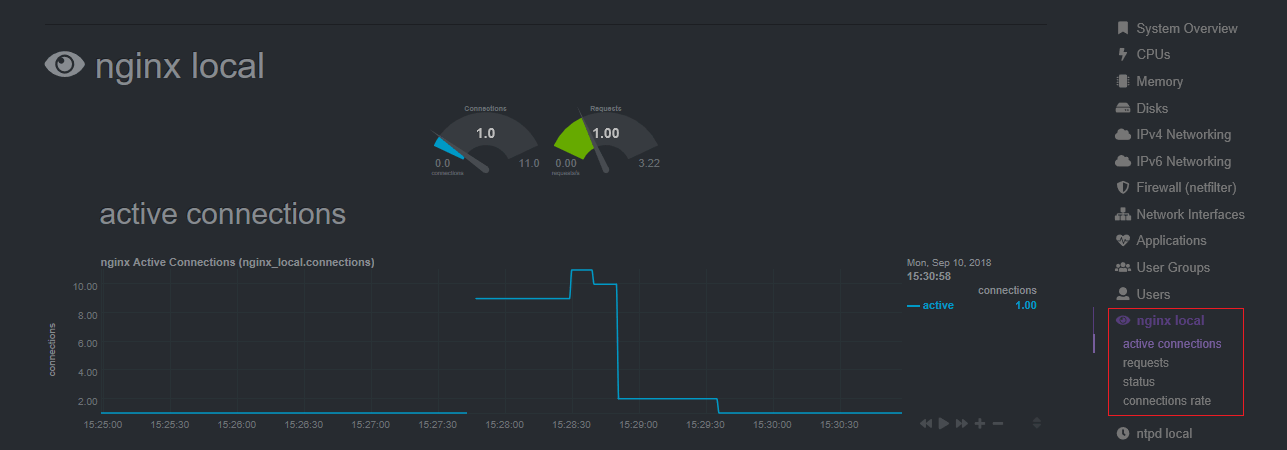
ตรวจสอบการใช้งานของ Nginx ได้ที่เมนูทางขวามือ “nginx local”
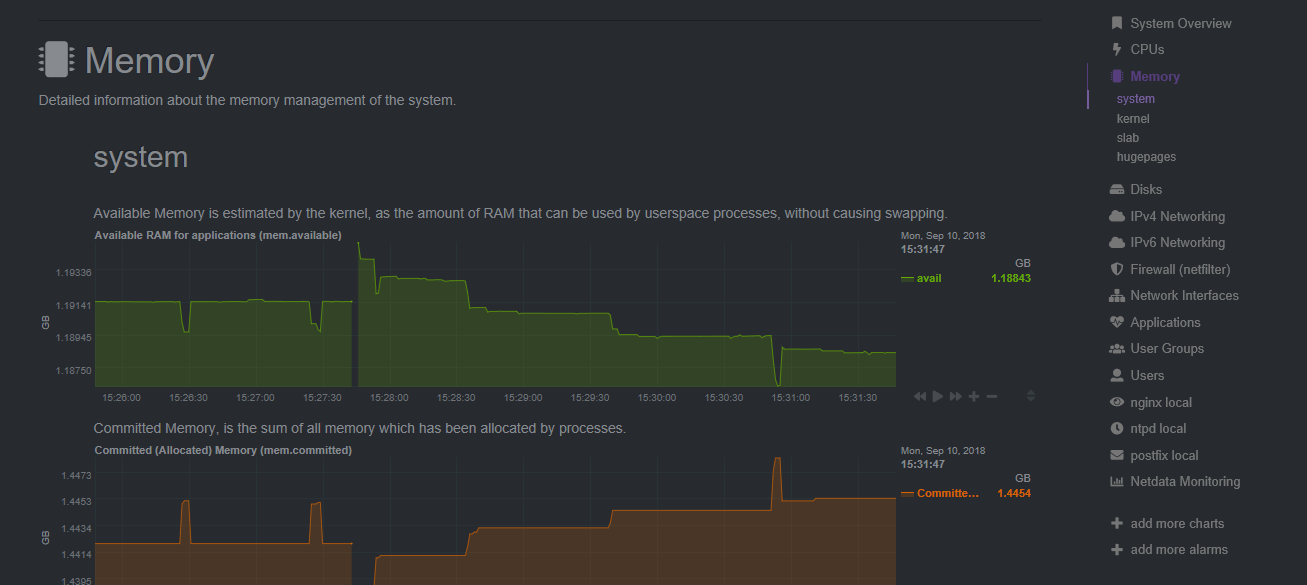
ตรวจสอบการใช้งานของ Memory
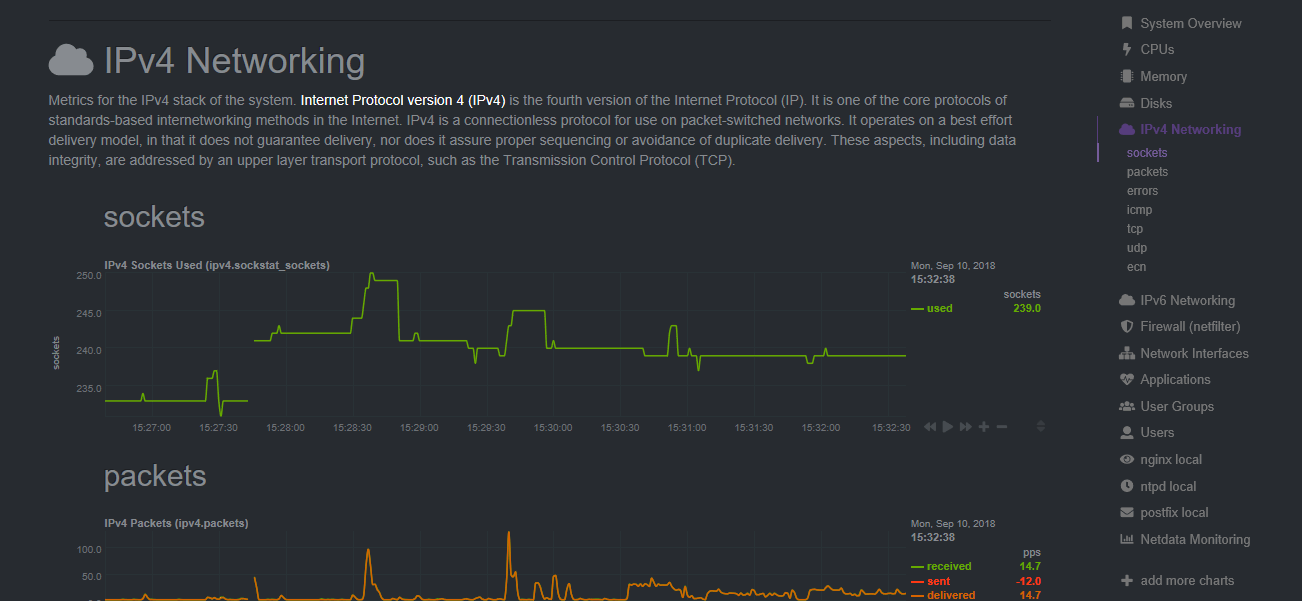
ตรวจสอบการใช้งานของ IPv4 networks
ทาง HostPacific หวังว่า NetData จะเป็น Monitoring ที่จะช่วยตรวจสอบ server ของท่าน เพื่อเป็นแนวทางในการปรับประสิทธิภาพของ server ท่านได้


